Easter craft ideas to enjoy with the kids
Over the Easter holidays, you’ll have plenty of time to play with your little ones, and Easter craft activities are top of the agenda! It’s the perfect time of year to unleash your creativity with the kids and show them how to get involved in a wide range of Easter crafts.
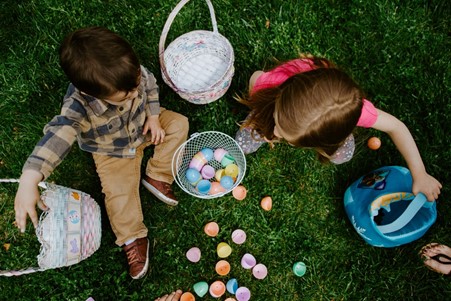
From small activities that take just a few minutes, to larger decorations that will brighten up your entire home. How about baking their favourite Easter themed treats, to foraging for nature’s goodies to make a wreath. Not forgetting a good old fashioned Easter egg hunt! We know most children are so excited to hear the Easter bunny is on his way. Here are some of our favourite Easter craft ideas.
1. Easter wreaths
Wreaths aren’t just for Christmas, as they’re also a very popular addition to front doors and interior walls during the Easter period. Making wreaths is a great Easter craft idea, as it gives kids the opportunity to be as imaginative as they wish. All kinds of materials can be used to create the wreaths and they can take many styles, from bright and cheerful to more earthy colours that represent springtime and Easter.
Bird’s nest wreath
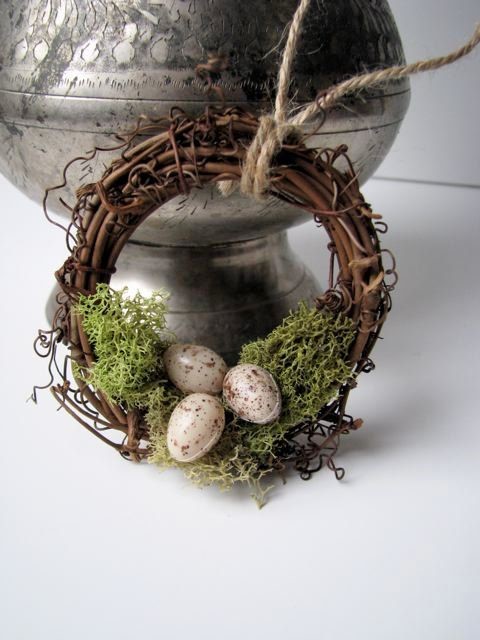
Image source: Pinterest
This natural wreath is very tasteful and would look great hung on any door - indoors or out. Here’s how to make it:
- Purchase a pre-made willow wreath, white craft eggs, twisted rope and some dried sphagnum crafting moss from any online or local craft store.
- Take your three white craft eggs and use a paintbrush to add brown acrylic detail to each so they look speckled in appearance. Then, leave the eggs to dry.
- Our next instruction is for adults only. Take the green dried moss and glue it onto the bottom of the wreath, using a cool melt glue gun (these are a lot safer to use around the little ones).
- After this, check your white craft eggs have dried completely, before adding a good helping of glue to the back of each and securing it against the wreath.
- Once the glue has set, grab the twisted rope and wrap it around the top of the wreath and tie it in a knot, leaving a spacious hoop; this will hang it up safely.
- Now you’ve decorated it to your taste, you will have a delightful wreath resembling a real-life bird’s nest that’s ready to hang on your door or wall!
- For added effect, you could glue some fluffy yellow chicks onto the wreath, too!
Pompom bunny wreath
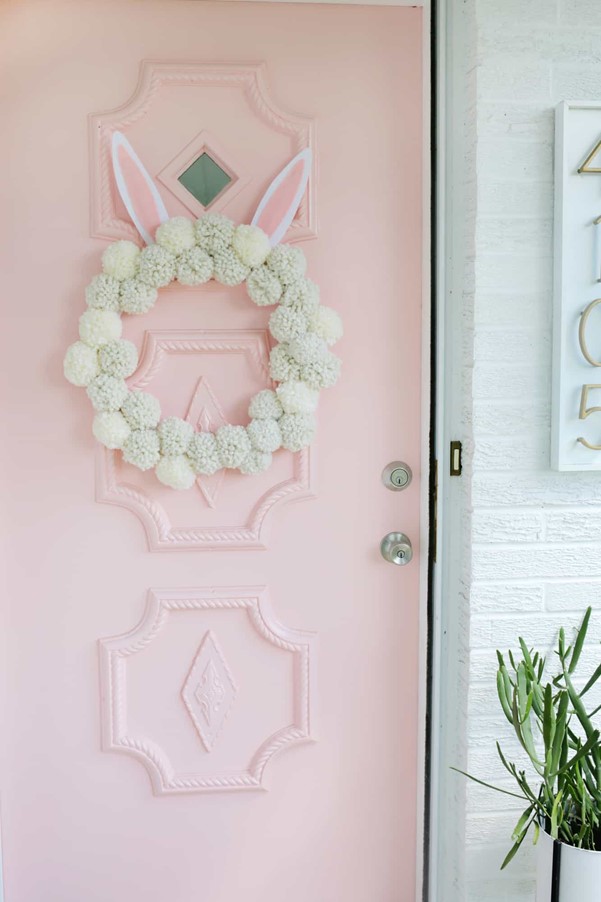
Image source: A Beautiful Mess
If you know how to make pompoms by hand, then teaching your kids how to create their own is a fun Easter craft in itself. If not, pompoms are very affordable and available from all good craft stores. Here’s how to turn them into a super cute bunny wreath:
- Create a cardboard or wire ring as explained for the bird’s nest wreath above.
- Attach enough bright white pompoms to cover the front of the ring. This can be done with the adult of the group using a cool melt glue gun. Or, you could possibly use double-sided sticky tape, as long as it’s strong stuff, and you’re generous with its application.
- Using either card or thick felt (or a combination of the two), cut out a couple of bunny ears – two large white triangles with smaller pink triangles glued onto them at the bottom.
- Stick the ears to the back of the wreath so that they’re sticking out of the top.
- Attach three pipe cleaners on either side to make long whiskers. You could even add a couple of bunny teeth near the bottom using thick white card.
2. Coffee filter flower cups

Image source: Home Confetti
Easter is when the flowers wake up after their long slumber, so here’s a way to celebrate their return with a fun and easy Easter crafts activity.
- Put aside six unused coffee machine filters for each flower you’d like to make.
- Fill some bowls with water and add 15-20 drops of a different food colouring to each (we recommend blue, red and yellow, although you can go for any colours you wish). Swirl the mixtures around so that the food colouring combines with the water.
- Place each set of six coffee filters into a bowl, pushing them down with your fingers so that they fully soak up the colourful water (don’t worry, it washes off your hands easily).
- Leave each set of coffee filters in their bowls for around 20 minutes.
- Now you’ll need plenty of kitchen towels, as each individual coffee filter needs to be sandwiched between a couple of them. To save space, you could stack up a tower, with each coffee filter placed between the paper towel below and the one above.
- The coffee filters don’t need to be completely dry, just not dripping wet. Now remove them from the paper towels and place them on a cooling rack or anywhere else where they can be left to dry properly (just be aware that some food colouring may still leak out, so we recommend not putting them near wallpaper or furnishings).
- Once fully dry and crisp, cut the filters into flower shapes of various sizes and then stack them into piles, gluing each piece to the one beneath it. Make sure to go from large to small from the bottom upwards.
- Fill each flower with small Easter treats, such as chocolate mini eggs, and use them to decorate your dinner table.
3. Easter grass displays
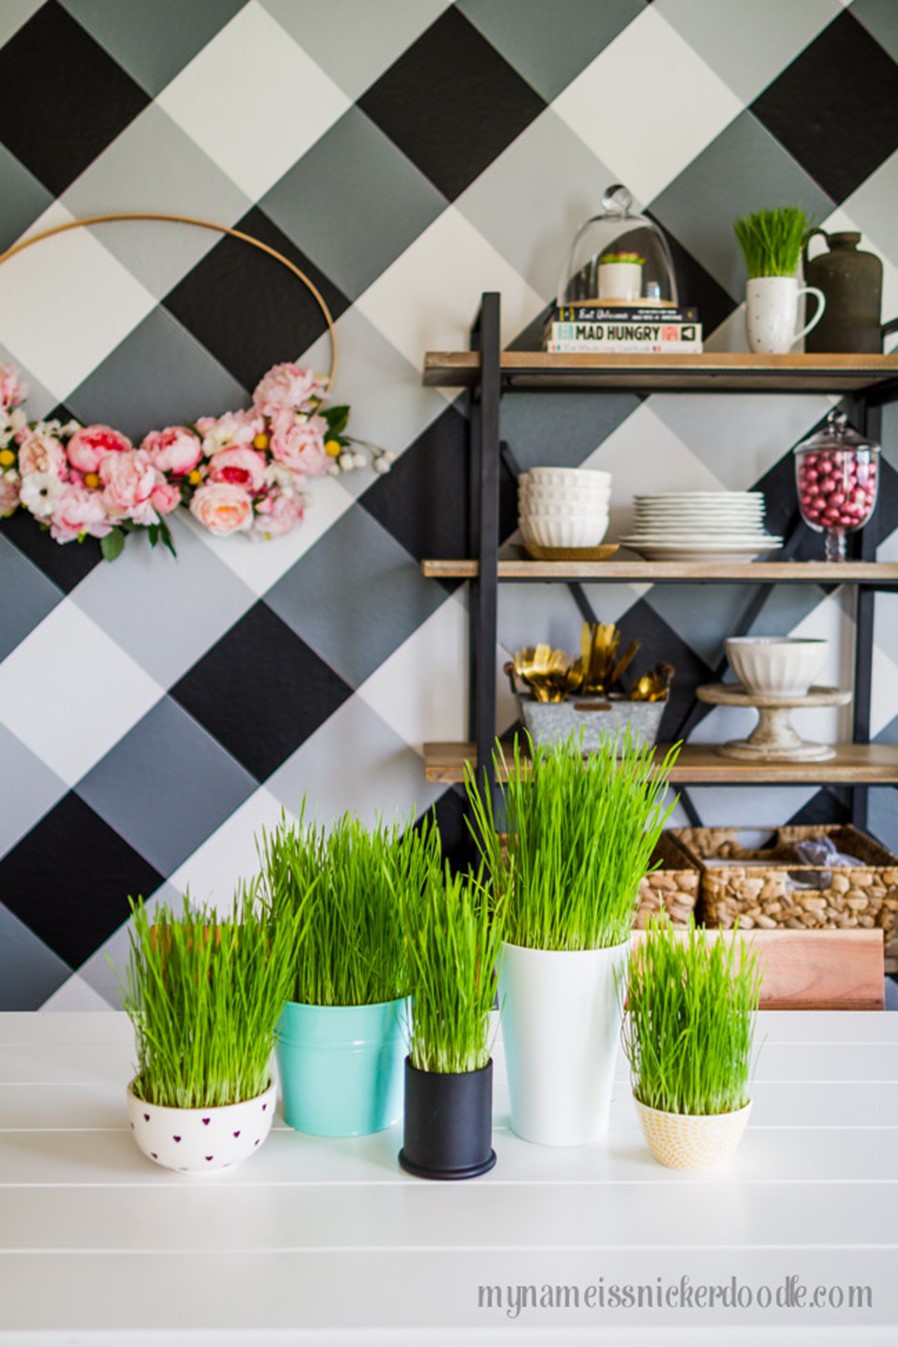
Image source: My Name is Snicker Doodle
Here’s a super easy Easter craft idea to enjoy with the kids, plus it’s a lovely way to bring the outdoors indoors.
- Plant some wheatgrass in transparent vessels, such as glass milk bottles or small vases.
- Water daily so that the soil remains moist but doesn’t become too wet.
- Once the grass has grown tall and lush, add some decorations. This could be jelly worms, mini Easter chicks, or even butterflies made with cardboard and coloured in a variety of cheerful shades.
4. Carrot garlands
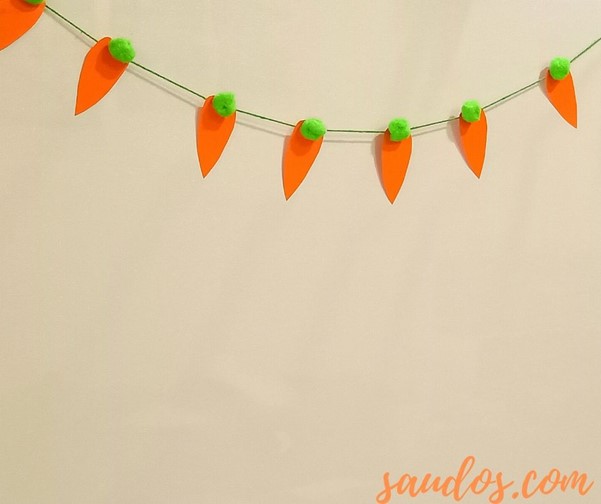
Image source: Saudos
Kids’ Easter crafts really are a great opportunity to make your home look fun and friendly. These carrot garlands can be hung wherever you like, such as from tables, TV units and bookshelves.
- Take a bunch of orange fabric or paper sheets (different shades of orange if you want to add some variety) and draw carrot shapes of various sizes on them in pencil.
- Cut out the carrots using scissors (if your kids are young, make sure to give them safety scissors, do the cutting yourself or invest in die-cut shapes - see our top tip below).
- Next, make some leafy tops for the carrots using green fabric.
- Attach the tops of the carrots to the bodies using a stapler or by sewing them together.
- Now attach the carrots to a long line of ribbon, again using either a stapler or a sewing kit. For added effect, use brown ribbon and attach the carrot tops to the ribbon, as this will make them look as if they’re growing underground.
- If you want to make your carrots look funny and friendly, add a pair of googly eyes to each one.
Top tip: if your little one isn’t quite old enough for scissors, or you’re just short on time, make this crafting activity a little easier by investing in ready made Easter themed die-cut shapes. With a whole host of shapes to choose from, from rabbits to eggs, die-cuts can make a crafting project just a little bit easier for small hands!
5. Easter masks
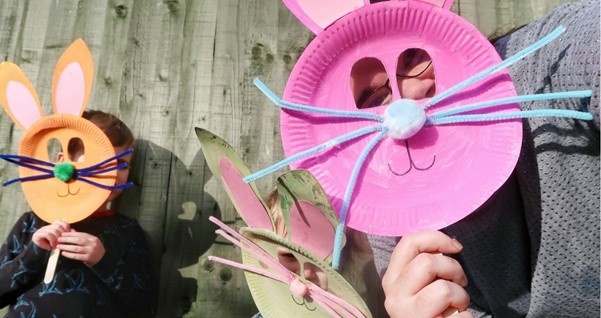
Image source: Someone’s Mum
We simply can’t share a list of children’s Easter crafts without including homemade masks. The easiest way to make Easter masks with the kids is with cardboard plates, as they’re perfect for adding all kinds of decoration.
- Begin by giving each person a cardboard plate – mums and dads, make sure you get involved!
- Next, pierce a hole on either side of the plate and thread a line of elastic through it. The elastic will need to be long enough to fit the wearer’s head, so measure each piece individually with a little extra space for the ends to be knotted.
- Each child and adult now need to put on their masks one by one, with an adult making light pencil marks where their eyes line up behind the cardboard.
- Cut out large eyeholes, then place a little sticky take around the edges of the holes to soften them.
- Now it’s time to decorate the masks! Whether you create cartoon faces of lambs, chicks and bunnies or go for more abstract patterns and shapes is entirely up to you. Don’t be afraid to add extra materials too, such as felt, pompoms, stickers, glitter and anything else that will make your mask stand out from the crowd.
Easter craft activities can be hard work, so why not treat yourself to a few luxury biscuits and some traditional confectionery from our pantry? We also have a wide range of Easter hampers available to help you, your family and loved ones celebrate Easter together in style! Or, for more tips, tricks and inspiration, head on over to our blog!